Production nuggets

Thought this would be a fun topic. Everyone has their favourite production tricks and ways of going about things. What are yours?

I can start with a boring but key one to me: So called «sidechaining» of bass to the kick, i.e. ducking the bass out of the way as the kick hits.

TLDR: Use a sidechained volume shaper like Cableguys Shaperbox or Devious Machines Duck! (I wasn’t intending on writing a white paper on the matter lol)

The main benefits of this technique are louder, cleaner and punchier mixdowns. Bass frequencies contain more energy than others, and avoiding overlap of kick and bass frees up a ton of headroom and reduces phase interference to a minimum. The latter equals less mud and a significantly punchier kick transient.

There are many ways to achieve the «sidechain» effect, the classic one being using a compressor on the bass track and feeding the kick into the compressor’s sidechain. Set the compressor’s threshold and ratio to clamp down on the bass whenever the kick hits. Use the fastest possible attack (the ducking should happen instantly).

Now tweak the release time to adjust how quickly the bass sound returns to its full level after having been ducked. This is a crucial step in regard to achieving a musical or transparent effect. Longer release times will result in obvious pumping, which can be a great way to inject movement and rhythmical feel to the bass/kick groove. Quick release times will be more transparent, and if you get it right you can make the ducking virtually inaudible while still reaping the benefits.

Especially with fast release times, you really need to listen carefully to get the «crossfade» timing from kick to bass correct. Too fast and it will create ugly artefacts as the bass wave jumps to full level while there is still residual bass in the kick wave. Too slow and it sounds disjointed. It can be beneficial to use an oscilloscope like Psyscope or Oszillos Mega Scope to get a visual on the sidechaining in order to help get things just right.

Some people prefer to create the effect manually with fades on audio regions, as this allows them to get really surgical with the release envelope shape. You also don’t have the problem of compressor reaction time. With a compressor, it is necessary to use the Lookahead function in order to eradicate the bass completely from the kick transient. This is because the compressor otherwise can’t duck the bass before the kick transient occurs, and by then you will already have a little bit of the bass wave interfering with the kick transient before the compressor clamps down. But by using a few milliseconds of lookahead, your DAW allows the compressor to receive the kick trigger just early enough that not a single sample of the bass wave is left to muddy up your kick transient.

Using the lookahead function will introduce latency to your audio playback. The mentioned manual audio fade method does not have this problem. The manual way turns into a massive pain when you want to make variations in your arrangement, though.

These days we have a new tool that gives us the surgical precision of manual fades combined with the «autopilot» responsiveness of a sidechained compressor: The volume shaper. This tool allows you to freely draw the fade curve, and the best plugins of this type can also be triggered by an audio signal just like a compressor. On top of that, they have a built-in oscilloscope which makes it a relative doddle to get the sidechain effect as transparent as possible. I am talking about Cableguys VolumeShaper (included in Shaperbox) and Devious Machines Duck.

Take the above mentioned principles of sidechaining with a compressor and apply them to your volume shaper of choice. A touch of Lookahead may be necessary, but these tend to react faster than a compressor, even without lookahead engaged.

Both VolumeShaper and Duck even let you do band-specific ducking. For example, if you have a saw wave bass, you can duck the low end without touching the «buzz» of the higher harmonics. Sometimes you may want the bass sound to be audible together with the kick, and this way you can achieve that while still getting most of the sidechain effect benefits.

If you want that clear modern mix sound, try sidechaining not just the bass but other sounds (and aux returns) too. Also duck parts to the snare to help it cut through. The snap is just a few milliseconds long, so you can go really tight with the ducking curve. The bass/kick curve needs to be a bit slower to keep the body of the kick from getting disturbed too much by the bass sound.

A great thing about sidechain-triggered volume shaping (or compression, for that matter) is that it only occurs when the kick is actually playing, so you don’t get any weird stuttering when the kick is quiet. Compare this to a volume shaper that just loops indefinitely regardless of what your kick is doing.

Master the volume shaper and it can take your mixes to the next level. Boring, but ultimately worthwhile :slight_smile:

4 Likes

You wrote a book therms. I do more extreme side-chaining aka remove the item that’s overlapping completely in favor of the more dominant sound. Then I do a traditional side chain compression on top of that. Usually everything keying on kick and snare delayed by 10ms. The goal is to side chain but not sound like side chain.

1 Like

Full spectrum sidechaining usually sounds better to me so that’s what I tend to do as well. Ducking only the lows is a nice option to have if you want a bit of bass sound bleed over the kick but it doesn’t sound as clear and punchy. A matter of priorities really.

In a way it’s similar to hard vs soft clipping of transients imo. Hard clipping is louder, less muddy and punchier at similar peak levels. But if you are digging into the RMS portion of the sound, soft clipping is often nicer. More of a characterful distortion than transparent peak reduction then. But that’s a different use case where loudness isn’t the focus.

Guess what I am saying is that extreme processing is more potent and even necessary if you want to go really loud, but for it to be transparent it needs to touch peaks only. Took me way too long to understand this simple concept lol. It’s basically about figuring out what you can get away with, and the window between nice and ugly is very small sometimes.

You have nailed it for sure, I still am not where I want to be. Can you elaborate on what you said about doing regular sidechaining on top of the volume shaping?

I should really do this more.

When I have done sidechaining (bass ducked to kick) I’ve been using sonible smart:comp set up to work like trackspacer. Now I think about it though, I’d be better off using a volume shaper to duck the bass, as my bass is generally only a few harmonics (sub and a bit of excitation), so there’s not much in the spectral domain to pass through. I’d get more control with a volume shaper, and save a few CPU cycles too.

1 Like

I have gone back to using side chain compression with the standard Ableton comp. Like I dig my my track out manually but at the very end I’ll enable the side chain on almost everything and it feels like it just pops those main hits through. I’m not sure why exactly. I imagine because I am clamping down early it’s more effecting that space before the hit. But I can show you my master and turn on and off the side chain and it makes a big difference to me.

That said side chaining isn’t even always needed. Depends on what you are going for. If you go 6-3 lufs you don’t have much choice.

1 Like

are you using the lookahead to clamp down early then, or some other method?

in the past I used polyverse gatekeeper to make a few volume shaping presets that ducked on the kick and snare but a little early so you got silence just before the hits. I would use it on break layers and such (with main kick and snare being oneshots). Can add a surprising amount of punch without being audible as silence. Can almost sound like a touch of transient shaping which is really cool considering it doesn’t increase peak level at all! So I think you are probably right about the early clamping thing.

So I know there are other ways to do this. It’s a don’t fix what isn’t broke situation honestly. But I will copy my drum bus and delete everything except the main hits which have their individual channel already. But I just set the track delay by 10ms and use that to key. It’s one of those things that should be obvious but I never put thought into it until someone made a tweet saying to do this. And it just clicked for me. Now I pay special attention to the area before the transients.

2 Likes

I use a Peak controller on the kicks in FL studio, then I use that peak to punch a hole in the sub frequencies with an EQ. I tweak it until the kick sound normal on a bass+kick situation. I avoid sidechaining plugins for some reason. Maybe not the best advice because my mixdowns are hit and miss but mostly “meh”.

1 Like

There is nothing wrong with the software but I don’t necessarily believe that one method is superior than the others. It’s just what you want for your situation. I was thinking about experimenting with using proq3 instead of compressor just to see what it’s like. You never know.

1 Like

that’s a cool method. You might get somewhat better results with a sidechain triggered volume shaper but I wouldn’t expect a massive difference. Have you tried ducking the whole spectrum instead of an eq band? Depending on the tune it could be a bit cleaner.

A different topic I like is custom made delays and reverbs. Running two delays in series is a fun way to get a much more interesting echo effect. Stick a reverb and some modulation fx in the path as well and you’ll soon have a chain that turns any audio snippet into something impressive :slight_smile:

Since I started doing dub techno I chain delays like hell. The last delay in the row can have some open delay to give it all a new rhythm.

2 Likes

For me, I use the Ableton comp for sidechaining the bass off the kicks and sometimes on pads to get the snare to cut through. Dynamic EQ on anything else that needs it so elements make room for others.

1 Like

Yeah I think for the kind of stuff you typically make, that makes sense. I always have that snare that pokes your eye out so I’m always chaining that and sometimes outher elements if it needs to be. I have been having like one loud hat in my pattern that I’ll key off of.

There is a fun trick where you have all channels in the project - except one - routed to a buss with a gate on it, and set the gate to close whenever that other track plays. In my head I call it the «incidental fx» trick.

The effect is very dramatic as anything you put on that special track will completely override the mix for its duration. It’s used in brostep for those incidental, loud obnoxious sounds that don’t have anything else playing at the same time. A lazy way to achieve an effect which would otherwise require a lot of manual or automated muting. I had some plugin delay compensation issues when trying to set it up so I haven’t had a chance to use it in a tune yet. Should be cool for turnarounds and other surprises when it works

1 Like

I don’t do it this way. It sounds like it’s quick to set up and what not but it’s not a problem for me just to cut out the tracks you don’t want playing. Just select them all together and delete. I actually use the technique constantly. To make it seem like the bass or whatever sound is louder than everything else. But I’ll do it with any type of sound. The last embers Nutta played I did it with a tom so I can get it to really boom instead of being a subtle little drum.

Will keep listening on Sunday when family allows, but I’m struggling to produce a new dub. I’ve managed a new false start every week for the last month. Like a full 150 bars at 163.75 before realizing I hated what I started with. So thanks for this topic!

1 Like

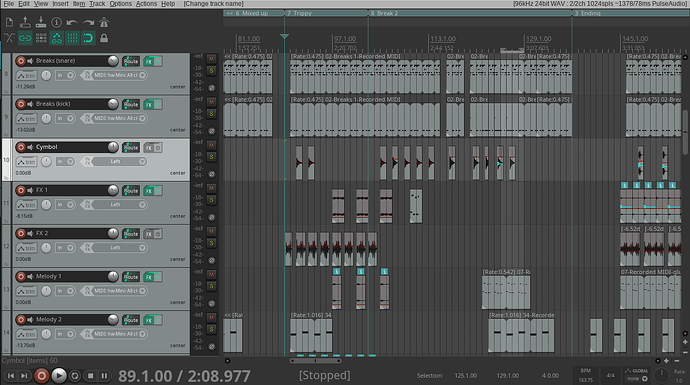
Beginner advice here, but a big thing for me that helped me finish tracks was learning to divide them into ‘regions’. Basically, a region is a selected timeframe of a group of tracks that can be dragged around to different spots within the tune.

I’ll start by making an intro region, then a break region, followed by an outro region. Then I’ll add several more break/chorus type regions and experiment. This lego like structure also makes it easier to test and get rid of subpar stuff.

Just seeing an unfinished region really helps me to push the track along.

2 Likes

There are no bad starts, only bad finishes. Send one of those to me if you want. One of my biggest pieces of advice is to follow through. There have been so many times where I thought the track wasn’t going anywhere but them when I broke through it was sick as hell. Because sometimes it’s not that easy. But just finish it off and then trash it but finish it. Now the only reason I don’t finish is because I got bored with the idea.

Ive always known about Paul Stretch but never used it as i was v happy w Akaizer & Abletons warping methods, esp for jungle. I gave Paul Stretch a try & am v glad i did as its an essential part of my ambient productions. In addition to being free, its excellent at creating textures which can be used on their own or make great layers for pads. My fave part is how you can skew it more or less toward noise or tones. Its even good for stretching and mangling something then stretching it back down to org length in the DAW to create a variation. But Im quite sure ppl who use it already know this

1 Like

When I have a bad start I keep the project and sometimes I go through the death pile and find something that I can rework quickly and turn it into a finished tune. So it’s better not to ditch them.

3 Likes